This site contains affiliate links, which we receive a commission from any sale or purchase, and are of no cost to you. As a participant in the Amazon Services LLC Associates Program, affiliate links will redirect you to Amazon.com and its affiliate sites. Please read our DISCLAIMER for more information
To begin, let’s take a look at the notes on the open-strings of the guitar. This might be new for some of you, and review for others, but having a strong understanding of the open-string notes will make learning the notes on the rest of the neck much easier when you are ready to move in that direction.
If you are new to the notes of the open strings, make sure to memorize them before moving on to the next sections of this lesson, as it will make moving forward much easier than if you are still working on learning these notes.
Try playing up these notes and saying each one out loud to help you recognize their location on the fretboard.
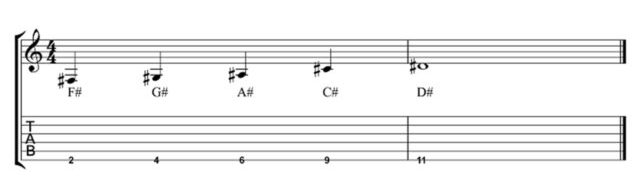
If you are going back down the string, switch to flats to learn to see those notes on the neck as well.
So F#, G#, A#, C# and D# would become Gb, Ab, Bb, Db and Eb respectively.
Once you have done this on the 6th string, as in the above example, take it to all the other 5 strings to work out the sharps and flats across the entire neck, one string at a time.
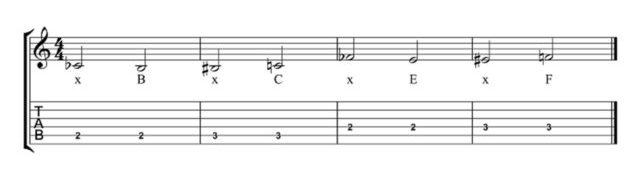
As I mentioned earlier, there are two notes that don’t use sharps, B and E, and two notes that don’t use flats, C and F.
This is because E and F, as well as B and C, are already a half-step apart.
So, if you lower C by a half-step, it doesn’t become Cb, it becomes B. Same thing if you raise E by a half-step, it doesn’t become E#, it becomes F.
C and F don’t take flats, and E and B don’t take sharps.
Memorizing the Lower Strings
this is where you would normally find the roots for any chord you are playing, so they are good to know.
And two, because you will see with the next section of this article that knowing these two strings will allow you to learn all the rest of the notes on the neck in no time.
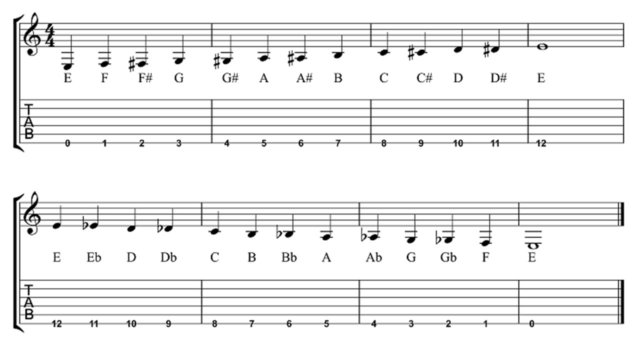
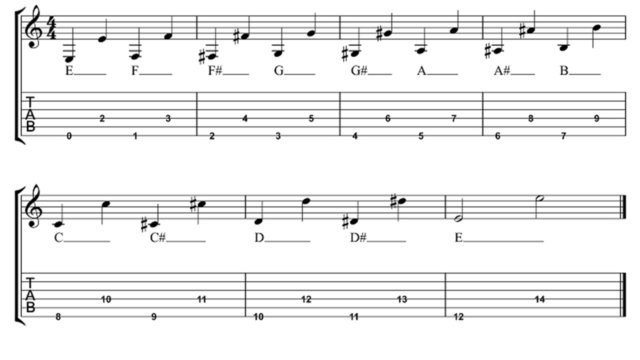
So to begin, here are all the notes on the 6th string of the guitar.
To practice both sharps and flats, say the sharps going up the string, and flats going down to be able to see both at the same time.
And remember to say each note out loud as you play up and down the string to really get the most out of this exercise.
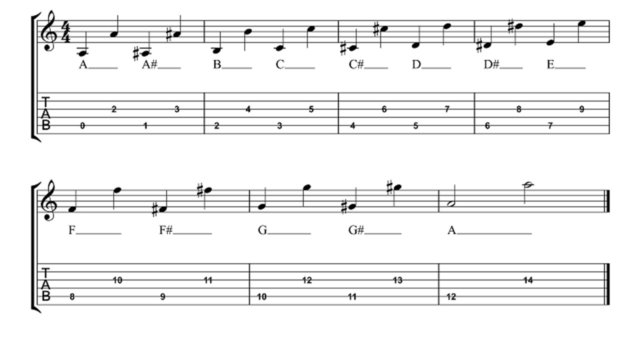
Here are the notes on the 5th string of the guitar.
Again, practice saying the sharps going up and flats going down in order to practice both and see how they relate to each other on the neck.
Memorize these notes before moving to the next exercise.
If you have already worked on the previous lesson and know the names of the “white notes” on the piano, then this won’t be too difficult as you are only adding a few extra notes to the ones you already know.
Octave Location Trick
The reason that we learn the lowest two strings first, is that you can use a simple trick to then learn all the rest of the notes on the neck, related them to the notes on the E and A strings that you already know.
To begin, if you know the notes on the low E string, you already know the notes on the high E string, as they are the same. So that takes 2 of the 6 strings out of the way already.
Then, you can take any note on the 6th string, add two frets and move two strings higher, and you get the same note.
So, if you have an open E on the 6th string. You can add two frets, jump up to the 4th string and you get the same note, E.
You can then repeat this technique to learn all the notes on the 4th string, relating the all to notes on the 6th string that you’ve already learned.
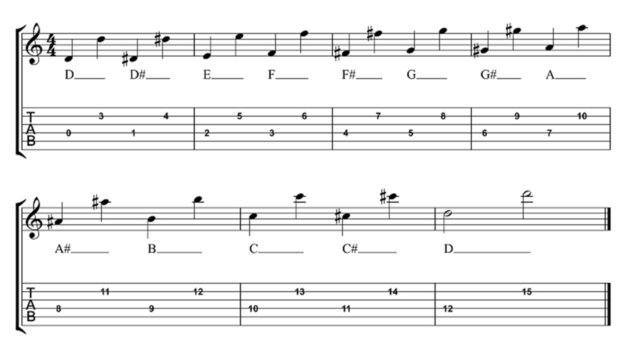
The same rule applies to the 5th string. Take any note on the A string, add two frets and jump up two strings to find the same note on the G string.
You can apply the same rule, with a slight twist, to notes on the 4th string as well.
You still go two strings higher, up to the B string, but you add 3 frets this time to get the same note on the 2nd string as you have on the 4th string.
As you can see, if you have a good knowledge of the lower two strings, you can then use one easy to apply technique to find all the notes on the other 4 strings without having to learn or work on them separately.
This is a great way to not only learn the notes on the neck, but to find any note on the fly.
So when working on this exercise, make sure to get the skill down of finding the notes on the neck related to the lower 2 strings, rather than just memorizing the notes and moving on.
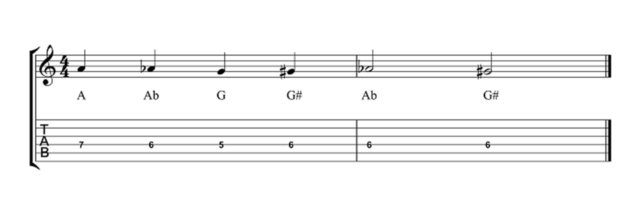
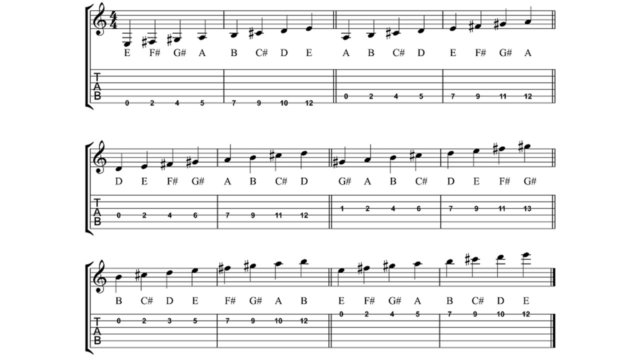
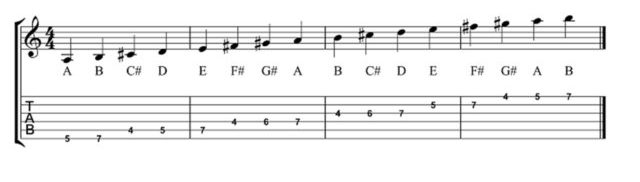
Major Scales on Single Strings
using the A major scale, the lowest possible note I can play from that scale on the 6th string is the note E. So we start there with this exercise.
Then, you play up the scale from that low note, saying each note out loud to add an extra layer to your practice routine.
Once you have done this ascending and descending on the 6th string, you can then repeat the same exercise across all 6 strings on the guitar.
It’s a tough exercise to do. But, by being able to see the notes across one string at a time, outside of vertical scale shapes, you are really testing your knowledge and solidifying these notes in your ears, under your fingers and in your mind.
The last exercise we will look at uses scale fingerings to help you learn the different notes on the neck.
In this exercise, you take any scale, such as the A major scale written out below, and you say the notes out loud as you play them on the guitar.
Saying the names of the notes out loud allows you to work on scale fingerings, which are an important part of learning the guitar, while learning the names of the notes on the neck at the same time.
You can also apply this technique to other melodic devices you are working on, such as arpeggios, modes, licks and patterns.
The key is to be able to see and name any note from any scale, arp, lick etc. that you are playing at any given time.
Try this exercise out without any time to begin, to make it easier to say each note. Then, when that becomes easy, add your metronome into the mix to take the exercise to the next level.
with a few exercises and visualization techniques, you can build enjoyable and educational approaches to learning these notes on the neck in your daily practice routine.
Learning the notes on the neck is an important skill for any guitarist to have, but it often seems like a daunting and boring task.
By working on 1 string at a time, and incorporating the technical and improvisational exercises listed above into your practice routine, you’ll be able to learn all the “normal” notes on the neck, (no sharps or flats), without becoming bored or frustrated in the practice room.
with a few exercises and visualization techniques, you can build enjoyable and educational approaches to learning these notes on the neck in your daily practice routine.